Do-it-yourself Wall Installation Instructions

Do It Yourself
Handy with tools? Like taking on projects around the house?Roll up your sleeves and do your own WALLTEK install.

Step 1
Get your WALLTEK products
Your organization adventure begins today! When your WALLTEK products have arrived, review them to make sure that your order was correctly processed and you have everything you need.

Step 2
Gather your tools
You'll need a power drill with a stud finder, a tape measure, a long level, a Roberston bit, a hammer, a block of wood, a square, a pencil, and 2" wood screws. For larger jobs, you can use these two optional tools: a circular saw with wood blade and an oscillating tool. One more thing - see if you can find an extra set of hands to help you out. Not necessary, but it will make your life easier!

Step 3
Mark your studs
With a stud finder, figure out where all of your studs are located behind your drywall. We suggest that you mark the inside edges of the studs, as well as the outside edges. It's best if you can center your slatwall panel over as many studs as possible on the wall.

Step 4
Map your wall
Place your level up against the t-rule and mark out the studs on your wall by drawing out vertical lines that show the location of each stud. With this framework in place, the installation will be a breeze.
Step 5
Place the first panel
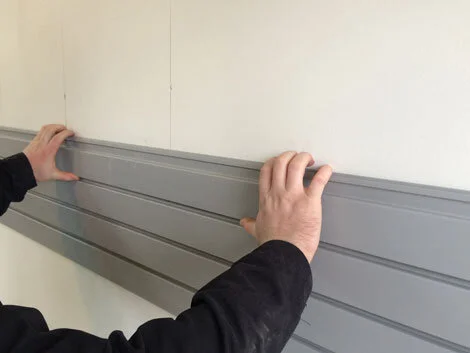
Place your 1st slatwall panel where you want it on your wall. Be sure that it is right side up and that it is completely level. Take a screw and drive it in to the stud. If you are installing multiple panels, start from the bottom and make your way up.

Step 6
Screw it into your wall
Now that your panel is up, take a look at the screw guide that is in the middle of each slat. For the outside of the panel, use one screw in each slat. For the rest of the inside slats, you can then alternate, using a screw in every other one. A good rule of thumb – if you've got a lot of weight to store, use more screws. If your storage items are lighter, use fewer screws. Make sure that the head of the screw is flush with the slat, but is not screwed in too tightly. When using multiple panels, you want a seamless connection, so press them into place and keep clear of the tongue and groove area.

Step 7
Line up your edges
You now want to be sure that your panels are cascading as they should. Do this with the long t-rule or the straight edge of the starting guide. You may notice that there is a 1/8" or so variation by panel, which is normal and will eventually be covered up when you apply the finish strip.

Step 8
Add more panels (optional)
Use a wood block and hammer to gently tap down the panel to ensure that the tongue & groove fits and connects. Make sure not to drill holes near the tongue & groove area. You should also check that the panels are level.

Step 9
Clean your wall panel
With your wall panels in place, it's time to give them a quick clean before moving on. Grab a household cleaner and some paper towel and wipe off any dirt or dust. Not only are WALLTEK panels super easy to clean, they are totally waterproof and antibacterial.

Step 10
Finish things off with fast caps
Cover the screws using fast caps to give your panels a clean look.

Step 11
Add Accessories
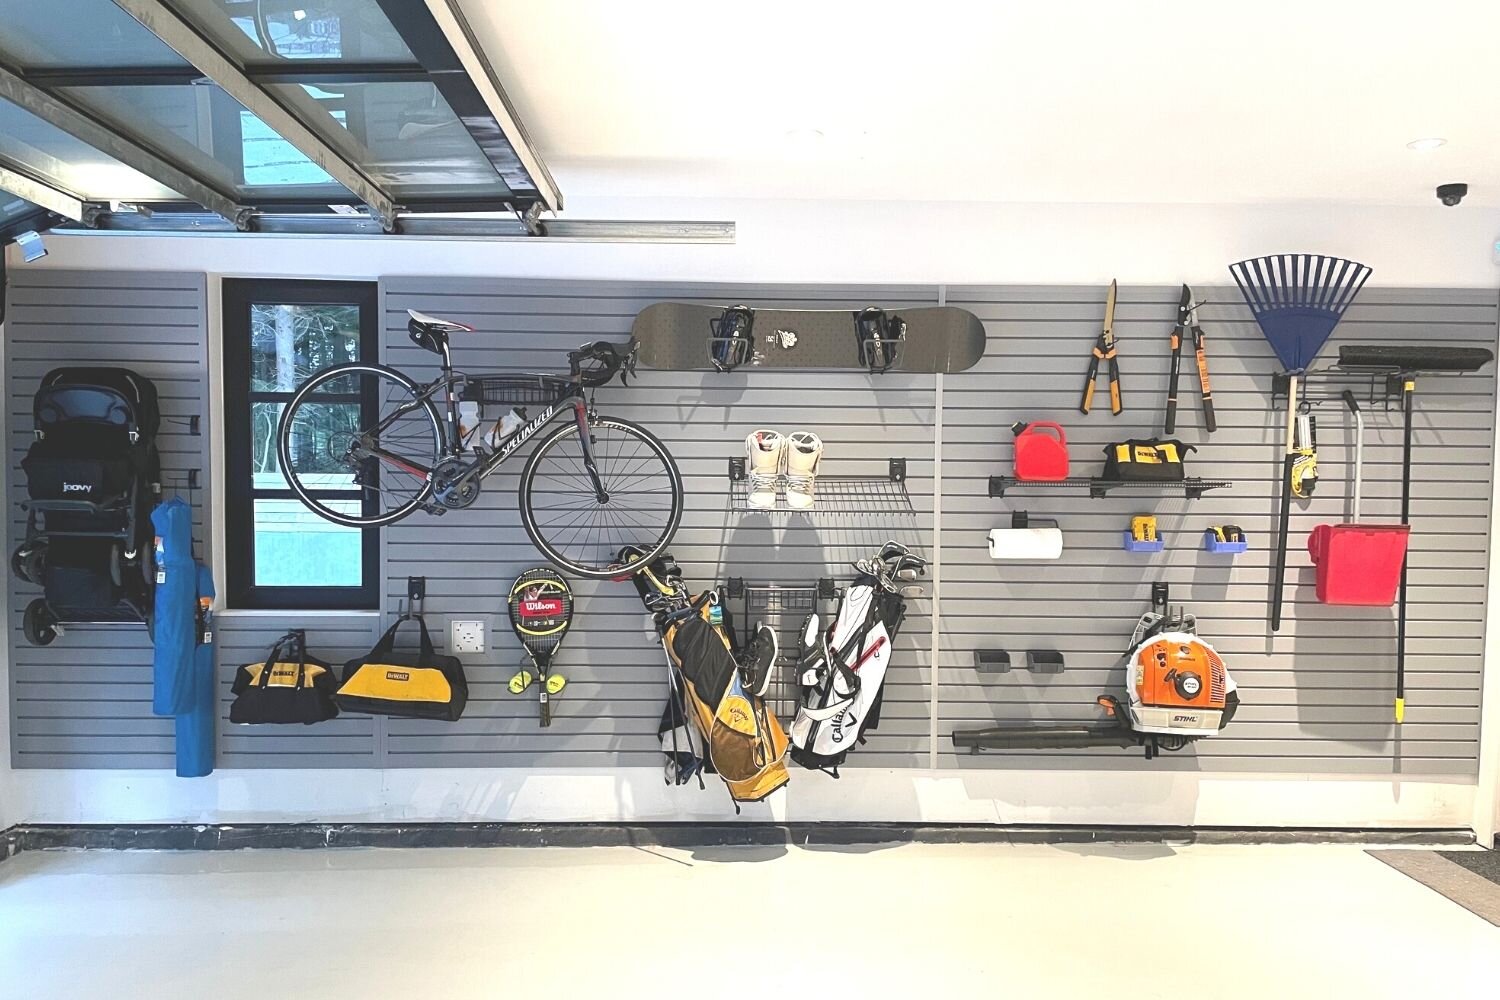
Now it's time to start adding your slatwall accessories. It's best to get started with the bigger things you want to store first, like the ladders, large bins and heavy tools. No matter how you're planning to put together your storage and organizational system, we have all the accessories you need to bring your ideal storage solution to life.
Step 12
Utilize the storage system
There is no one perfect way to put together your slatwall solution. Every space is different, which is why we have so many different accessories and options available. Pick and choose what you need to best organize your stuff and your space. Don't be afraid to get inventive and use your imagination! The sky (or should we say the ceiling) is the limit with WALLTEK.